


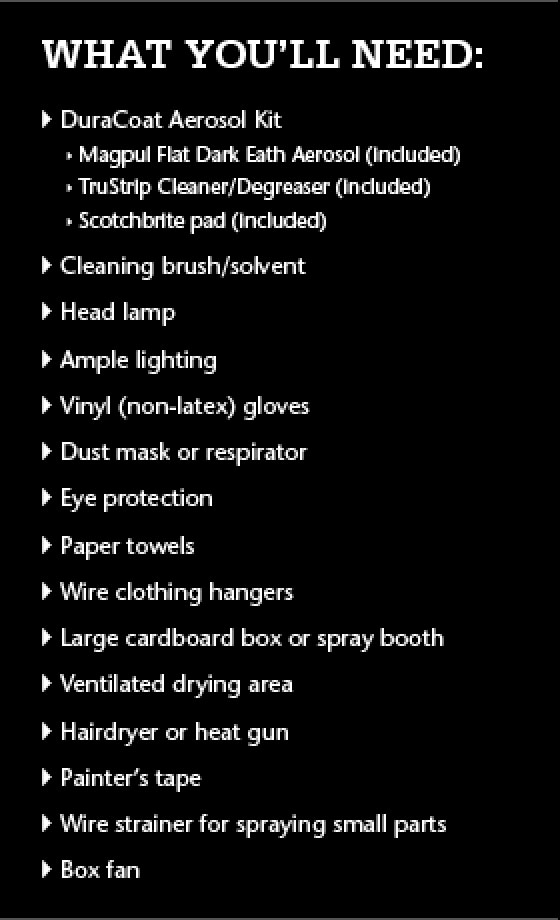
Learn how to apply your own DuraCoat finish using Lauer Custom Weaponry's new DuraCoat Aerosol Kit with this do-it-yourself guide.
Our world is bursting with vibrant color, that is, until you walk into your local gun store. Sure, you’ll find the occasional snub nose with pink grips or maybe a gold-plated Desert Eagle, but as gun buyers we’ve become mostly pigeonholed into an uninspired color palette modeled closely after the first hour of The Wizard of Oz.
After all, what’s not to love about warm wood grain or that deep, rich gloss of a blued revolver? Maybe you prefer bold stainless steel, or even one of those scary black anodized aluminum semi-auto rifles?
Don’t get me wrong, there’s a special place in my heart for basically every gun in the gun store, and I own most of the traditional firearms previously alluded to. However, I’ve always wished I could just click my heels and own a gun with a custom color scheme without breaking the bank. Since the guns in my collection looked like those in every big box store in America, I set out to follow the yellow brick road and add a touch of color to my ordinary armory.
A number of professional firearm painters reside in my area; however, I like weekend projects—or any excuse to hang out in my man cave for a few hours. I’d heard of DuraCoat, a specialized firearm paint that’s extremely resistant to the abuse of typical field usage. Manufactured by Lauer Custom Weaponry, DuraCoat comes in hundreds of colors and can be applied to almost any surface, including metal, wood and plastic. Until recently, when Lauer began offering DuraCoat in a convenient aerosol spray can, you needed to have specialized equipment and training to properly apply the finish.
With its new DuraCoat Aerosol product, Lauer Custom Weaponry set out to add a touch of color to the stale palette of firearms. Now, any weekend warrior like me who has ever picked up a can of spray paint has the ability to personalize their guns at home. That was exactly my level of proficiency with painting guns. This article serves as an account of my experience as a novice using the product for the first time.
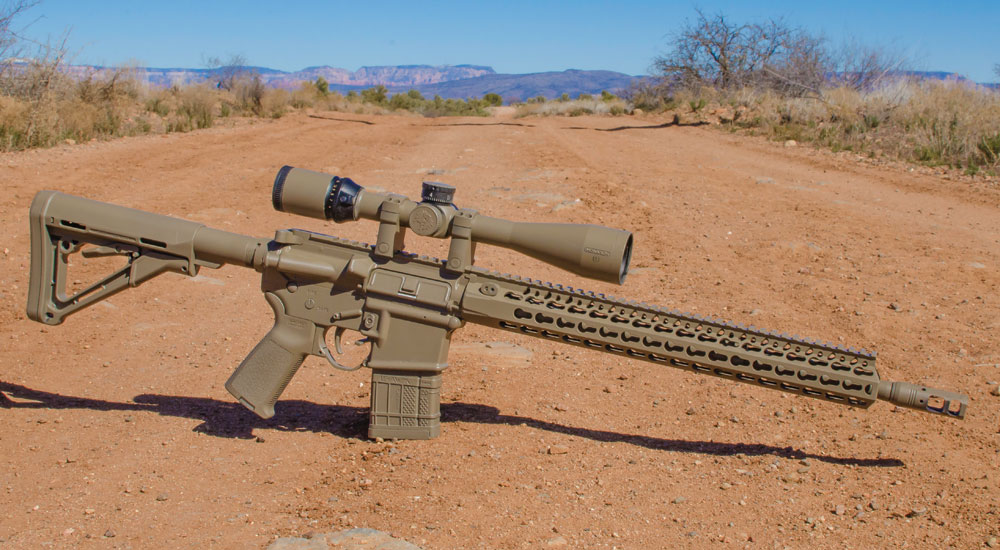
Living in the Southwest, Magpul Flat Dark Earth (FDE) was a fitting color choice so I could blend in with rocks and high desert sage country while calling for coyotes. So I ordered a can of DuraCoat Aerosol in Magpul FDE and dismantled my favorite AR-15 while I waited for the can to arrive a few days later. As I waited on the product to ship, I also began a detailed cleaning of every part stripped from my rifle. I used Hoppe’s No. 9 and thoroughly cleaned each piece as it was removed from the rifle.
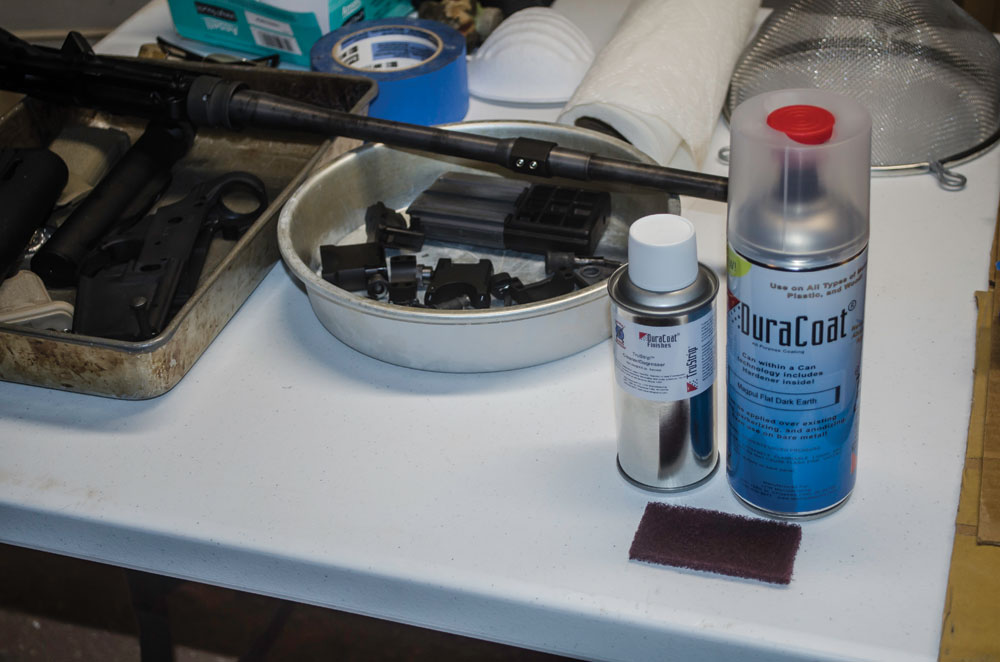
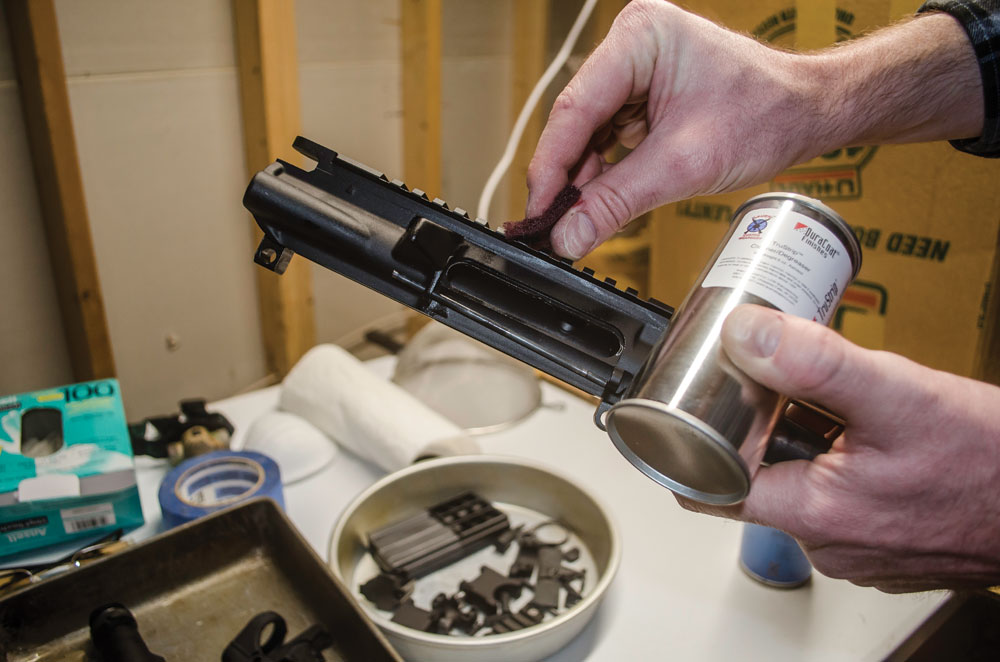
Lauer Custom Weaponry strongly stresses the disclaimer that DuraCoat must be applied to a clean, dry surface. Any residual oils or dirt WILL absolutely ruin your chances of having a quality, long-lasting paint job. Lauer ships the DuraCoat Aerosol Kit with a can of TruStrip degreaser and a ScotchBrite pad, which combine to be very effective at removing oils and debris. However, I wanted to be doubly sure that my gun was clean.
After using Hoppe’s No. 9, I baked all the rifle parts in my kitchen oven at it’s lowest setting of 150 degrees for a half hour. Lauer did not suggest this step, but I found that it resulted in residual oils seeping from deep inside the metal that I later removed with TruStrip. I’m sure there’s some technical metallurgy term for this phenomenon, but again I am a novice gun painter.
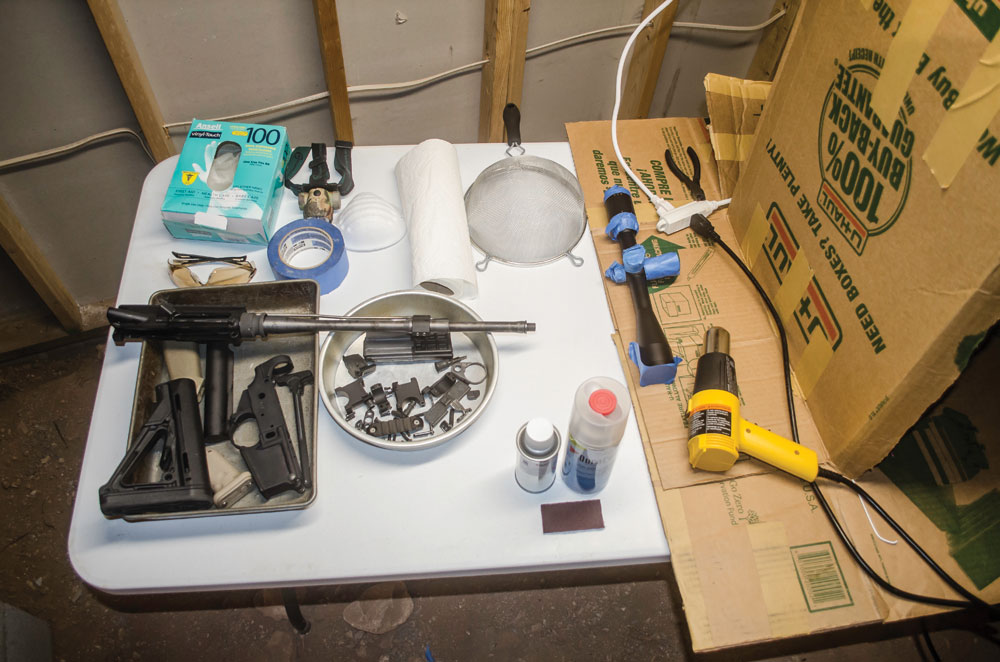
Once everything was clean, I built a makeshift spray booth in the unfinished part of my basement. The booth was made from a large cardboard box set on an old card table that I positioned in a well-ventilated area under a large shop light. Looking like a doctor before surgery, all the tools I needed were easily accessible. Once you start spraying the DuraCoat, you will not want to leave the painting area to fetch important tools.
Finally, it was almost time to start applying DuraCoat. First, I used wire cutters to section off 6- to 10-inch segments of wire clothing hangers to suspend each rifle part from the cardboard spraying booth. Once all the parts were hanging, it was time to activate the DuraCoat Aerosol can.
This is where the magic of DuraCoat Aerosol happens. Dubbed by Lauer as “can within a can technology,” the product actually has a separate reservoir of DuraCoat paint hardener built inside the can. The DuraCoat paint is activated once the hardener reservoir is punctured and agitated. As directed, I shook the can for two minutes just like a normal can of spray paint to mix the Magpul FDE color. Then I inserted an included red plastic plug into the bottom of the can and pressed until I heard an affirmative “click” or “pop” noise to puncture the hardener reservoir. To fully activate the DuraCoat Aerosol, I then shook the can for another two minutes to mix the hardener with the FDE color.
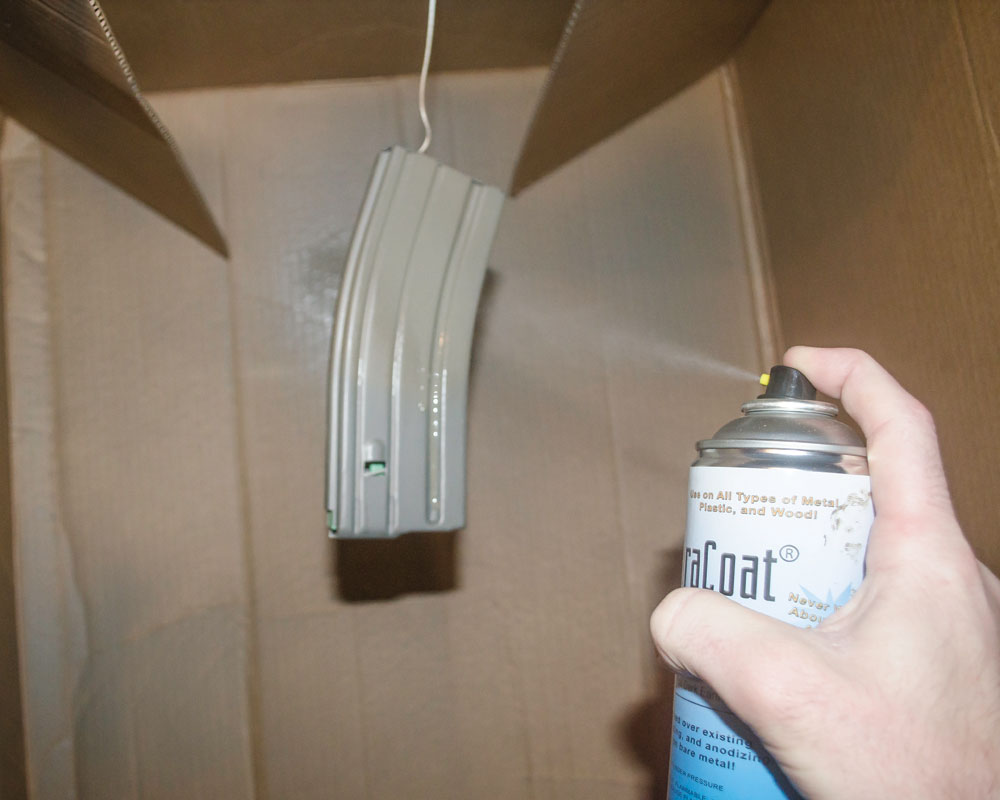
Now it was time to give my black rifle the desert paint job I dreamed of. I started by spraying an aluminum 30-round magazine for a quick practice run to make sure I was applying the paint correctly. A few mists of Duracoat onto the mil-spec mag gave me the confidence to keep going. “This is pretty easy,” I kept thinking to myself, wondering secretly if I was doing something wrong.
The next parts that received FDE paint were large parts such as the receivers, barrel and handguards. I followed the instructions from Lauer’s YouTube video and lightly applied the DuraCoat to each part with long, sweeping strokes about 8-12 inches away. After each coat, I immediately “flashed” the coating with my heatgun on the lowest setting. According to Lauer, this causes the solvents in DuraCoat to evaporate and is the first step in the drying/curing process. I did this three times to each part to achieve three coats.
Once each piece received three coats, I transferred them from the spray booth to hang from a copper pipe in my unfinished basement to dry overnight. For the small parts such as the trigger pins, magazine release and bolt catch, I put them in a wire strainer and sprayed them until lightly coated. There might be a better way to paint the small parts but this method worked fine for me.
Overall, applying DuraCoat was incredibly simple. In fact, the most difficult part was taking apart the AR-15 and degreasing every part. Looking back, I am extremely happy with the results but reluctant to take on another DIY AR-15 DuraCoat project any time soon. The AR-15 has so many small parts and a huge amount of surface area to cover, which is why I ended up needing to use two cans to complete the project. For the cost of two cans ($40 each) plus the total time spent, I'd probably opt to have my next AR-15 professionally painted. Others will probably enjoy the DIY process.
 Once dried, I noticed two small paint runs, which were on the first two pieces I sprayed. This was a result of holding the spray nozzle too close to the part. Since the runs were basically unnoticeable, I left them as they were. Had I wanted to, I could have taken some 1,000-grit sand paper to the run spot and then touched up the area with more DuraCoat, but that was not necessary for this project.
In the future, I plan to spray a Glock 17 with the same Magpul FDE color because now it only seems fitting to have a handgun to match the rifle. There’s also a rusty Remington 870 sitting in my safe that would greatly benefit from DuraCoat.
After hunting and target shooting several times in the desert with my freshly DuraCoated AR-15, I’ve found the finish to withstand regular wear and tear without scratching or chipping. The DuraCoat Aerosol finish is here to stay and will probably last longer than my lifetime, meaning that this project turned my everyday AR-15 into a prized family heirloom.
Thanks to Lauer Custom Weaponry’s DuraCoat Aerosol, the firearm world is a more colorful place and my rifle is camouflaged into the high desert. When it comes to giving your guns a custom DuraCoat paint job, there really is no place like home.
Editor's Note: This article is an excerpt from the July 2016 issue of Gun Digest the Magazine.

Next Step: Get your FREE Printable Target Pack
Enhance your shooting precision with our 62 MOA Targets, perfect for rifles and handguns. Crafted in collaboration with Storm Tactical for accuracy and versatility.
Subscribe to the Gun Digest email newsletter and get your downloadable target pack sent straight to your inbox. Stay updated with the latest firearms info in the industry.


")
")
")
")
This may be a dated reply, but I thought I’d throw out a tip on how to deal with small parts that need to be painted.
Home Depot sells tiny but very strong little magnets with a hole in the center, the size of a chick pea. If you take some common plastic covered wire (same as to tie a trash bag) and attach the wire through the magnets hole, you now have a method to affix small parts to be painted that have minimal contact, this allows you to easily move the part so that you can hit all the sides.
I tried this Duracoat vs some of Brownells offerings, both have their pros and cons. I was surprised that both seemed to do a pretty good job. Naturally not as good as Cerakote, but close. The key to both is prep.